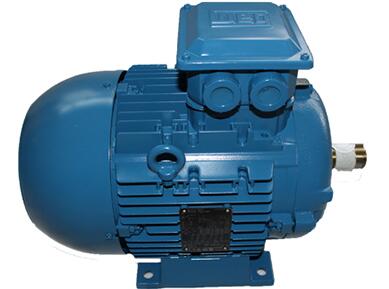
High-efficiency and energy-saving motors have been paid attention to by major industries because of their advantages such as energy saving and high efficiency, and are highly recommended for use. However, in the process of using this motor, we should not forget the daily maintenance of high-efficiency and energy-saving motors. For example, after use, we must remember Clean the impurities and dust inside. If it is not used for a long time, it should be inspected and maintained regularly.
High-efficiency and energy-saving motors refer to motors with higher efficiency, and their efficiency should meet the relevant energy efficiency grade requirements. The motors produced by our company have the characteristics of low noise, low vibration, high efficiency, and compatible with frequency converters.
High-efficiency and energy-saving motors can be used to drive a variety of different machinery. In order to ensure that high-efficiency and energy-saving motors can work normally, in addition to normal use in accordance with operating procedures and normal monitoring and maintenance during operation, regular inspections and motor maintenance should also be carried out.
In addition, the advantage of regular inspection is that it can eliminate some problems in time and prevent the occurrence of faults, thereby ensuring the safe and reliable operation of the motor. So what are the regular inspection items for high-efficiency and energy-saving motors? Let the editor share it with you below!
The regular inspection items for high-efficiency and energy-saving motors are as follows:
1. Clean and wipe the motor promptly
After using the high-efficiency and energy-saving motor, we must promptly remove the dust and sludge on the outside of the high-voltage motor base. If the usage environment is dusty, clean it once a day. Then check and clean the motor terminals. Then check whether the wiring screws of the junction box are loose or burned.
2. When assembling the motor, install the rear end cover .
Put the shorter end of the rotor shaft vertically upward, then put the rear end cover on and lay it flat, then use a wooden hammer to tap the end cover left and right, and at the same time, turn the end cover to slowly rotate on the shaft so that the bearing enters the shaft sleeve. The force is evenly applied without damaging the bearing seat. After it is in place, if the rear end cover has an oil seal cover, the oil seal cover screws should be installed.
3. Carefully put the rotor into the stator, and then close the rear end cover.
Tighten the rear end cover screws in alternating diagonal order, then install the front end cover and tighten the screws in the same way as the rear end cover. If the front end cover has an inner oil seal, it is inconvenient to install the fixing screws in the holes after the end cover is installed. The following method can be used to solve the problem: Find a piece of iron wire with a diameter of about 2mm, fold it at a right angle at 30mm, and insert the wire into the screw hole of the inner oil seal cover. When installing the front end cover, pass the iron wire into the oil seal screw hole of the front end cover.
We can install the front end cover according to the above method, and then tighten the wire. Align the oil seal cover holes, install the two fixing screws, pull out the iron wire from the hole, and install one screw.
4. Turn the rotor of the high-efficiency and energy-saving motor to check whether it rotates flexibly and whether the sweep is loose. Check whether there is any noise in the bearing, whether the screw installation is firm, and then install the fan blades and wind shield. Use a megohmmeter to measure the insulation resistance of the winding, turn on the power to test the machine, and use a clamp meter to measure whether the three-phase current is balanced.


