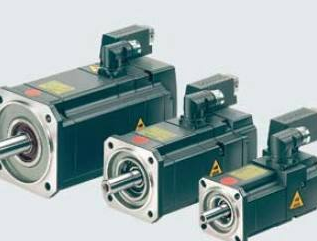
We introduced the functions of the servo motor driver last time, so everyone must have understood it. For the servo motor reducer, its main transmission structure is: planetary gear, sun gear, and external ring gear. So what is the installation method of servo motor reducer? Let’s discuss it with the editor below!
The rated input speed of the servo motor reducer can reach more than 18000rpm (related to the size of the reducer itself. The larger the reducer, the smaller the rated input speed). The output torque of the industrial-grade servo motor reducer generally does not exceed 2000Nm. Specially-made super-torque servo motors reduce speed. The machine can achieve more than 10000Nm. The working temperature is generally around -25°C to 100°C, and its working temperature can be changed by changing the grease.
The installation method is as follows:
Correct installation, use and maintenance of reducers are important links to ensure the normal operation of mechanical equipment. Therefore, when installing the planetary reducer, the following installation and operation related matters must be strictly followed.
Step: Before installation, please confirm whether the motor and reducer are intact, and strictly check whether the dimensions of the parts connecting the motor and the reducer match. Here are the dimensions of the positioning boss of the motor, the input shaft and the groove of the reducer, etc. Fit tolerances.
Step 2: Unscrew the screw on the dust-proof hole on the outside of the reducer flange, adjust the PCS system clamping ring to align the side hole with the dust-proof hole, and insert the inner hexagon to tighten. After that, remove the motor shaft key.
Step 3: Connect the motor and reducer naturally. When connecting, it is necessary to ensure that the concentricity of the output shaft of the reducer and the input shaft of the motor is consistent, and that the outer flanges of the two are parallel. If the concentricity is different, it will cause the motor shaft to break or the reducer gear to wear. In addition, during installation, it is strictly forbidden to hit with a hammer to avoid excessive axial or radial force from damaging the bearings or gears.
Tighten the installation bolts before tightening the force bolts. Before installation, wipe the anti-rust oil on the motor input shaft, positioning boss and reducer connection parts with gasoline or zinc-sodium water. Its purpose is to ensure the tightness of connection and flexibility of operation, and to avoid unnecessary wear and tear. Before connecting the motor and reducer, the motor shaft keyway should be vertical to the tightening bolt. To ensure uniform force, screw on the mounting bolts in any diagonal direction, but do not tighten them, then screw on the other two diagonal mounting bolts, and finally tighten the four mounting bolts one by one. Finally, tighten the force bolt. All tightening bolts need to be fixed and checked with a torque wrench according to the indicated fixed torque data.
The correct installation between the servo motor reducer and the mechanical equipment is the same as the correct installation between the reducer and the drive motor. The key is to ensure that the concentricity of the reducer output shaft and the driven part shaft is consistent.


